
Table of Contents
There’s something magical about gathering around the table with loved ones, sharing a meal that warms both the heart and soul. Tonight, you can create that magic with a dish that’s as comforting as it is flavorful. This 7-layer recipe combines the rich depth of Tex-Mex traditions with the ease of a home-cooked favorite.
In just under two hours, you’ll have a dish that’s perfect for family dinners or leftovers. The layers of crisp tortillas, silky sauce, and melted cheese come together in a harmony of textures and flavors. Plus, with homemade sauce, you control the taste, making it even better than restaurant versions.
Whether you’re a seasoned cook or just starting out, this recipe is designed to be approachable. With expert-tested methods and authentic Texas roots, it’s the ultimate comfort food for any occasion. Let’s get started and bring a taste of Tex-Mex to your table tonight!
Key Takeaways
- Create a comforting, flavorful dish in under two hours.
- Perfect for family meals or leftovers, yielding 4-6 servings.
- Combines crisp tortillas, silky sauce, and melted cheese for rich textures.
- Homemade sauce ensures superior taste compared to restaurant versions.
- Easy-to-follow recipe with authentic Tex-Mex roots.
Introduction to Chili Con Carne Enchiladas
Tex-Mex cuisine brings a unique blend of flavors that tell a story of cultural fusion. This dish, a staple of Tex-Mex kitchens, combines cheese-stuffed tortillas with a rich, beef-enriched chile gravy. It’s a comforting meal that’s as much about tradition as it is about taste.
Originating in 1940s Texas diners, this recipe evolved by blending chili con carne with the classic enchilada format. The result is a dish that’s deeply rooted in Tex-Mex history. Its popularity grew as it became a symbol of the region’s culinary creativity.
The “7-layer” interpretation adds depth to the dish. It starts with a hearty chili base, followed by layers of tortillas, three types of cheese, onions, sauce, and garnishes. Each layer contributes to the overall flavor and texture, making every bite a delight.
Unlike Arizona or Mexican versions, which often use fresh chile sauces, this dish features a roux-thickened gravy. This gives it a unique richness. The contrast between crisp, oil-fried tortillas and the saucy topping creates a perfect balance of textures.
Cheese plays a dual role here. It acts as a binder for the filling while melting into a gooey topping. This combination ensures that every bite is both satisfying and indulgent. It’s a testament to the dish’s Tex-Mex roots and its ability to bring people together.
Gathering Your Ingredients
The foundation of any great dish lies in the quality of its ingredients. For this recipe, you’ll need a mix of fresh and pantry staples to create layers of flavor. Let’s break it down into two parts: the chili and the assembly.
Essential Ingredients for the Chili
Start with ground beef—opt for an 80/20 blend for richer flavor. You’ll also need chili powder, which adds depth, or substitute with dried chiles like ancho or guajillo for a smoky twist. To thicken the sauce, toast flour or use cornstarch for a gluten-free option.
Spices are key. Include cumin, oregano, and garlic powder for a balanced profile. Fresh onion and tomatoes add brightness and texture. These ingredients come together to create a hearty, flavorful base.

Ingredients for the Enchilada Assembly
For the assembly, corn tortillas are essential. They provide a gluten-free structure and hold up well when layered. Choose a neutral oil like canola to fry them lightly, ensuring they don’t overpower the dish.
Cheese is another star. Sharp cheddar cheese adds tang, while a blend with Velveeta ensures meltability. Garnish with fresh onion and cilantro for a sharp, refreshing finish. These layers create a harmonious blend of flavors and textures.
With these ingredients, you’re ready to build a dish that’s both comforting and satisfying. Let’s move on to preparing the chili and assembling the layers.
Preparing the Chili Con Carne
Mastering the art of browning beef is the first step to unlocking rich, savory flavors. This process ensures your dish has a deep, caramelized base that enhances every bite. Let’s dive into the techniques that make this recipe stand out.
Browning the Ground Beef
Start by heating a large pan over medium-high heat. Add the ground beef, breaking it into small pieces with a spatula. Cook for 12-15 minutes, allowing the meat to develop crispy bits. This patience pays off in texture and flavor.
Drain excess fat but reserve about 2 tablespoons. This retained fat adds richness and helps sauté aromatics like garlic and onions. Season the beef with salt and pepper during browning, saving spices like cumin for later steps.

Simmering the Sauce
Once the beef is browned, it’s time to build the sauce. Sprinkle 2 tablespoons of flour over the meat to create a roux. This prevents graininess and thickens the mixture evenly. Stir in chili powder and other spices for depth.
Slowly add beef stock, stirring constantly to control the thickness. Incorporate tomato puree or crushed tomatoes for an umami boost. Let the sauce simmer on low heat for 45-60 minutes. This tenderizes the beef and deepens the flavors.
| Step | Tips |
|---|---|
| Browning | Cook for 12-15 minutes, drain excess fat, season with salt/pepper. |
| Simmering | Use a roux, add stock slowly, simmer for 45-60 minutes. |
Assembling the Enchiladas
The assembly process is where the magic happens, transforming simple ingredients into a layered masterpiece. Each step ensures the final dish is flavorful, textured, and visually appealing. Let’s break it down into two key stages: softening the tortillas and rolling them with the filling.
Softening the Tortillas
Start by heating a pan with neutral oil over medium heat. The oil should shimmer, indicating it’s around 350°F. Fry each corn tortilla for 5-10 seconds per side until pliable but not crisp. This prevents cracking during assembly.
After frying, drain the tortillas on a rack or paper towels. This step ensures they don’t become soggy. Properly softened tortillas are easier to roll and hold their shape better.
Rolling and Filling the Enchiladas
Begin by spreading ½ cup of the base mixture on the bottom of your baking dish. This prevents sticking and adds flavor. For each tortilla, add ¼ cup of cheese and 1 tablespoon of the prepared filling. Roll tightly and place seam-side down in the dish.
Nestle the rolled tortillas tightly together to hold their shape. For extra flavor, dip each tortilla in the sauce before filling. This method prevents mushiness and ensures every bite is saucy and delicious.
| Step | Tips |
|---|---|
| Softening | Fry for 5-10 seconds, drain on a rack, ensure pliability. |
| Rolling | Spread base sauce, add cheese and filling, nestle tightly. |
Baking and Serving Your Enchiladas
Baking transforms your assembled layers into a golden, cheesy masterpiece. This step ensures the flavors meld together while achieving the perfect texture. Let’s explore how to bake and serve your dish for the best results.
Baking to Perfection
Preheat your oven to 425°F for crisp edges or 400°F for even melting. Place the dish on the lower rack to ensure consistent heat distribution. Bake for 10-15 minutes, or until the sauce bubbles at the edges and the cheese melted uniformly.
Once baked, let the dish rest for 5 minutes. This step ensures structural integrity, making it easier to slice and serve. The resting period also allows the flavors to settle, enhancing every bite.
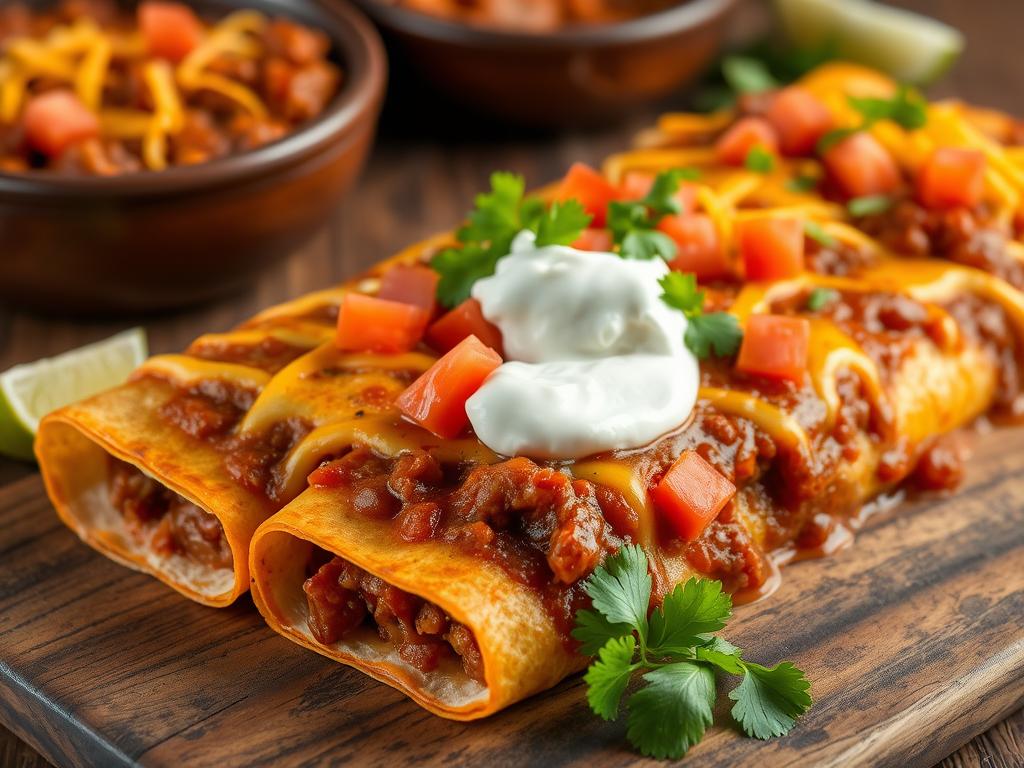
Garnishing and Serving Tips
For a refreshing crunch, soak diced onion in ice water for 10 minutes before sprinkling it on top. Add fresh cilantro after baking to preserve its vibrant color and aroma. These garnishes elevate the dish visually and flavor-wise.
Pair your meal with classic side dishes like Mexican rice, refried beans, or avocado salad. These accompaniments balance the richness of the main dish, creating a well-rounded meal.
| Step | Tips |
|---|---|
| Baking | Preheat to 425°F or 400°F, bake for 10-15 minutes, rest for 5 minutes. |
| Garnishing | Soak onions, add cilantro post-bake, pair with sides. |
Conclusion
Bringing together layers of flavor and texture, this dish is a celebration of comfort food and creativity. From the crisp tortillas to the gooey cheese pull, every bite offers a perfect balance of heat and richness. This recipe is versatile—swap in pepper jack for extra spice or try vegetarian beans for a plant-based twist.
For busy schedules, the chili base freezes well for up to three months, making it a convenient make-ahead option. Each serving packs 761 calories, with a good dose of fiber and protein to keep you satisfied.
Share your creation on Instagram and tag @modern_honey with #modernhoney for a chance to be featured. This dish isn’t just a meal—it’s an experience worth celebrating with loved ones.
FAQ
What type of ground beef works best for this recipe?
Can I use flour tortillas instead of corn tortillas?
How do I prevent the tortillas from breaking when rolling?
What cheese is best for melting on top?
Can I make this dish ahead of time?
How long should I bake the enchiladas?
What side dishes pair well with this recipe?
Can I use store-bought sauce instead of making my own?
Explore More:
How to Cook Frozen Ground Beef in Instant Pot
How to Whip Up a Delicious Ground Beef Cabbage Skillet
How to Make the Best Bulgogi Recipe with Ground Beef
How to Cook Ground Beef in Instant Pot: 5 Essential Tips
How to Make Grilled Beef Ribs That Will Wow Your Guests